Saturday, 26 July 2014

Green Tea Frappe


Healthy Green Tea Frappe (makes one)


Hey guys!
I personally love green tea with everything including ice cream, sweets and other delicious snacks.

Today, I going to share with you my very own recipe on how to make the best healthy green tea frappe that is perfect to drink on a hot summers day :)

Now let's start!!


Ingredients
  • 1 tsp of green tea powder (or matcha powder)
  • 250ml of semi skimmed milk (a cup)
  • Two ice cubes
  • 1-2 tsp of Agave or (Honey)
Tips

- Use a chopstick to stir the green tea and it is easier to wash afterwards
- Can melt the honey (melted already with hot water) with the green tea powder

Method
  1. Add 1tsp of green tea powder into a blender cup.
  2. Add a tiny amount of hot water to form a green tea paste.
  3. Add the agave (optional to add now or later for taste).
  4. Pour in 150ml of semi skimmed milk into the blender cup.
  5. Add in the two ice cubes
  6. Blend away and you have yourself a frappe :)
Here is the finished product, so simple!!!!


Like this post guys!!
Until next time, bye! :)

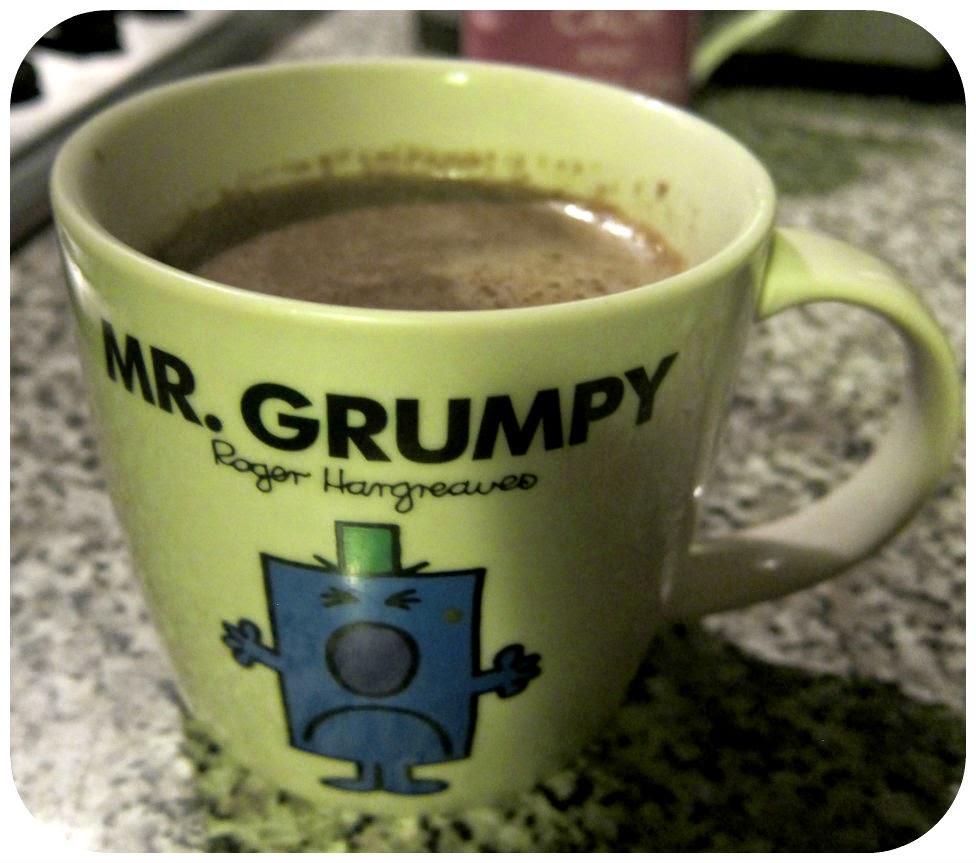
Good For You Hot Chocolate Recipe

Good For You Hot Chocolate Recipe (makes 1)


Hi guys! I just want to share this hot chocolate that my dad makes all the time, and it is soo simple to make.

This would be a great drink to make before you go to bed or just relaxing on the sofa, watching TV or on your laptop watching Netflix :)

Hope you like it, repost and leave a few comments below if you have any questions on how you felt about this recipe!


Ingredients


  • Dark chocolate (at least 70%) (I recommend using Lindt or Green & Black's Organic Chocolate)
  • 250ml semi skimmed milk (1 cup)
  • 1 tsp Agave nectar (alternative: honey)
  • Cinnamon (optional)
  • Vanilla extract (optional)

Tip
- Using a whisk to stir the mixture in the pan, will make the hot chocolate frothy.


Benefits

Dark Chocolate:
As opposed to milk and white chocolate, dark chocolate has a high cocoa content and it is very nutritious. It has been known to reduce blood pressure and it is rich in fibre and iron.

Agave nectar: As opposed to sugar, agave is a natural sweetener which has not been processed unlike sugar and also it will not cause a rise and fall in blood sugar.


Method (5 minutes)
  1. Pour the milk into a pan and then turn on the heat medium-low heat, do not boil. (if you do it the other way around this, it may cause the pan to burn and the milk may splatter - don't fall victim to this!
  2. Place the dark chocolate into the pan, this will immediately begin to melt. Using a whisk or wooden spoon, stir until the chocolate has become fully integrated into the milk.
  3. Then add the agave nectar or honey into the hot chocolate and stir.
  4. Once the milk starts to produce bubbles, turn off the heat and remove the pan from the heat. (Careful not to burn yourself - use an oven glove)
  5. Get your cup/mug and pour the hot chocolate in.
  6. Add toppings such as a few marshmallows and whipped cream from a spray can.


Thanks everyone for viewing this recipe!
Comment below and keep updated :)


Thursday, 24 July 2014

Healthy Simple Pancake Recipe

Healthy Simple Pancakes Recipe (makes 4-7)


Hi everyone!

Just wanted to share this recipe, because it is another one of the pancake recipes that my my sister has always used and it has been altered, so it is more healthier.

It's simple, no complicated ingredients and it's healthy - I hope you like it!

This pancake usually makes for 7 people if you are using a small pan. I used a 21cm pan, whilst one of my bigger pan measured to 28.5cm, therefore it will make for around 4 people. Before pouring the mixture into the pan, since I used the small pan, I measured the mixture up to 1/2 of my ladel, but for a bigger pan I would insist on using up to 3/4 of the ladel, but not too full.

 Ingredients


  • 125g of sifted plain flour
  • 200ml of semi skimmed milk
  • One egg
  • 1tsp of sugar (optional)
  • Pinch of salt (optional)

Tips
- If you are are using sweet toppings, don't add sugar!
- Use honey instead of syrup as a heathier alternative
- Use melted dark chocolate instead of milk chocolate as a healthier alternative
- Instead of ice cream, use frozen yogurt as a healthier alternative
- If you plan to use strawberries on your pancake, to get rid of the stalk, use a straw by inserting the straw right through the end of the strawberry and the stalk should break loose.
- If you want a crispier pancake, leave the pancake to cook longer on each side or add more oil to the pan.
- If you have put too much mixture into the pan, don't worry! Just keep turning the pan in circles quickly until the mixture is evenly spread.
- For an extra small pancake, using a spoon, scrape the remaining mixture and around the edges of the bowl into the pan.
- If you have put too much oil in the pan, use a kitchen paper towel to get rid of the excess oil and then you can re-use that kitchen paper towel for your next batch of pancakes!
- To test if the pan is ready, (make sure there is oil) use a wooden chopstick and place the end onto the pan, if it sizzles then you know the pan is hot enough to cook the pancakes
- Open a window, your kitchen might get a bit steamy from cooking the pancakes.
Method
  1.  Pour the sifted plain flour into a large bowl
  2. Make a well (hole) using your index finger into the middle of the plain flour
  3. Crack an egg and place the egg into the middle of the well
  4. Gradually add the milk bit by bit as you stir the mixture using a whisk or wooden spoon. Stir until the mixture is liquid and the ingredients are fully integrated (scrape the bottom of the bowl because some of the flour might be stuck on the bottom of the bowl)
  5. Using a kitchen paper towel, grease the pan using sunflower oil or extra virgin oil (make sure you grease the sides of the pan too)
  6. Pre-heat the pan to a medium heat (make sure it's hot!) And using a ladel, scoop the pancake mixture up to 1/2 - 3/4 of the ladel (depending on the size of your pan).
  7. Place the mixture into the centre of the pan and quickly twist the pan in circles until the mixture is evenly spread out - if you do not do this straight away the mixture will be uneven.
  8. Once the mixture begins to lift off the pan, check using a spatula and lift the pancake slightly to see if the other side is slightly golden.
  9. Once the side is slightly golden, flip to the other side (don't cook the sides for too long!)
  10. Cook the other side until you see brown spots appearing.
  11. Place the pancake on a large plate.
  12. Grease the pan again using your kitchen towel paper and complete the same steps for your next pancake.

Toppings
  • Nutella
  • Strawberries
  • Banana
  • Blueberries
  • Honey
  • Syrup
  • Ice-cream (or frozen yogurt)
  • Cheese (low fat)
  • Chocolate sauce
  • Peanut Butter
  • Jam

Thanks for viewing this recipe, if you have any questions, please comment below and let me know what you guys think of this recipe and also repost if you like this recipe :)
Keep updated!


Wednesday, 23 July 2014

Heathy Low-Fat Banana and Coffee Milkshake

Healthy Low-Fat Banana and Coffee Milkshake

(makes one)

Hello everyone!

I decided to post one of my sister's milkshake recipes, because she is always making drinks and likes to experiment with the flavours and the ingredients - this is the first time she has made this drink, and it tasted really nice so I thought I would kindly share this healthy recipe to you all :)

Although this drink may not look very appealing, I guarantee you will not be disappointed with how it tastes!


You don't have to stick with these ingredients, if you think you can make this recipe healthier for example using soya milk instead of semi-skimmed milk- even better! Or if you really want to taste the coffee in your milkshake, use less bananas and so on.

This is what I used...


Ingredients
  • Half a cup of semi-skimmed milk (alternative: soya milk/almond milk/coconut milk I really recommend using Alpro products) - if you intend to use almond milk or coconut milk, the taste might be different.
  •  1 banana (if you only have a small banana, use 1 1/2 bananas)
  •  2 tsp instant coffee (alternative: instant decaf coffee)
  •  1 tsp sugar (optional)
  •  3 cubes of ice (optional)

Milkshake tips

- If you are using a banana in the future making of milkshakes containing bananas, it can act as a natural sweetener, so there's no need to use sugar, unless you have a sweet tooth of course!
- Honey can also be a healthier alternative to sugar.
- Although you put ice in your drink, it might take a while for your milkshake to cool, so stir the ice using a straw or spoon to cool the drink instantly!
- Do not blend the ice in the blender with your drink, it might make your drink taste watery and you may lose the flavour!
- Add a small tsp of cocoa powder, to make your drink taste richer


Method

  1. Put 2tsp of instant coffee in a small bowl, add add hot-warm water to dissolve the coffee and stir for a few seconds until you get a murky dark brown coloured liquid
  2. Chop the bananas
  3. Place the coffee substance into the blender container
  4. Pour 1/2 cup of the milk into the blender container
  5. Add the banana into the blender container
  6. Secure the blending tool on top of the blending container (if you have a different blender, just pour all the ingredients into the container)
  7. Blend until all ingredients are liquefied!
  8. Taste and add more of the ingredients that you think will make the drink more tasty (if you think the drink is too thick, add a bit more milk, but if you add too much milk, then you might lose the flavour)
  9. Add three cubes of ice, if they are big cubes add two and stir using your straw or spoon and add a sprinkle of cocoa powder for decoration (optional)
  10. Enjoy your drink!


My opinion: I thought this drink tasted really nice, it tasted light and also the coffee really brings out the flavour. Using fresh ingredients and making milkshakes yourself is not only healthier but it even tastes healthier because you don't get the taste of thick creamy milkshakes that are full of additives like the ones you get in fast food restaurants.
However, my sister did add 1/2  of Alpho coconut milk and 1/2 semi-skimmed milk, hoping the coconut milk was not too strong and that the semi-skimmed milk would weaken the coconut milk, but she regretted adding the coconut milk, as she found the drink tasted bitter and the combination did not work, so she recommends using just one product (so no mixing different flavoured milks).

If you have tried this recipe, please repost and comment below, I'll love to hear what you guys think of it.

Also check out my beauty and skincare reviews and tell me what you think! :)

Keep updated!


Non-churn Ice cream

Hey!
I made some ice cream in less than 15 minutes and this is how it's done...


I got ideas from the Goodfood website, here is the link to the non-churn ice cream. Here.
I altered the Goodfood recipe slightly, you can do the same too!

Method
  1. I mixed vanilla from one vanilla pod and ½ a 397g can sweetened condensed milk with a whisk.
  2. I then cut up around 400g of strawberries.
  3. I wanted to add a bit of crunch so I found some biscuits lying around and crushed some up.
  4. In another bowl whisk 600ml of double cream until there are soft peaks.
  5. Stir in the condensed milk.
  6. Add the strawberries and crushed biscuits.
  7. Freeze overnight or for at least four hours.
Here is my finished product!, hope you like it :)


Tuesday, 22 July 2014

Review: 3CE ( 3 Concept Eyes) lipstick colour #507 LALA

3CE ( 3 Concept Eyes) lipstick colour #507 LALA


Stylenanda is a leading company of the online fashion industry, specialising in women's clothing and accessories. They produce, sell and distribute a variety of women's clothing and fashion goods with outstanding sense and unique ideas.

This is from the Stylenanda website :)

I personally came across this clothing and makeup brand on Lookbook a while back, about four years ago, back then Stylenanda was not a popular as it is now. Their website was not as fully developed as now too. Stylenanda is like Topshop but has more unique designs that I find hard to find in other shops that I shop at. I would like to try their clothing and I tried to get hold of their clothing in Hong Kong as they have opened up a branch there in a store called I.T. However, the clothes are very expensive in HK and I figured that it would be better if I travelled to Korea to buy the clothes there.

Today, I will be reviewing the Stylenanda lipstick in #507 LALA
This is what it looks like:


I took a few photos of the lipstick on and without, my lips are naturally quite pink and so if you buy this and try it on, the colour may look different on your lips depending on your lip colour.


Description:  I would say that this lipstick colour is light orange. A colour which is not drawn to the redish orange or the pinkish orange. On the Koreadepart website, they supposedly said that one touch application will give soft and high colour.
 
How to use: Apply onto lips naturally from inward filling gently.
 
Cost: I bought this for 13.45 HK Dollars which is around
 
My thoughts: I love the colour payoff on this lipstick, it is highly pigmented and I like how the packaging is sleek and simple, the packaging is very similar to MAC. I would say the quality is quite high. The price is a bit cheaper than MAC and if you're looking for a budget lipstick which is also high quality, I think you should try out the Stylenanda lipsticks. The only bad thing I would say is, it looks very dry on the lips and this would look very bad on very dry lips. Make sure you moisturise your lips before applying this lipstick on. The texture is like dry paint which seems odd. If I was to buy this product again in a different colour, I would, because their range of colours are insane, they have so many!! Even if you may not like this particular colour, there are a range of colour you can choose.
I would buy this again because of the pigmentation and not for anything else.
 
Pros:
  • Highly pigmented
  • Simple packaging
  • Good quality
Cons:
  • Very dry on the lips


Review: Etude House Alphabetical Sheet Mask - Hyaluronic Acid

Etude House Hydrating Mask - Hyaluronic Acid


I have always loved Etude House product every since I heard it from a Youtuber, so I decided to try out their masks as they are doing a promotion.

Etude House is a South Korean Cometic and Skincare brand owned by Amore Pacific. Their brand theme is Princess like and they believe that makeup should be playful.
Their aim:
  • High quality
  • Affordability
  • Lovely design
  • Diverse colour range
Etude House has opened up stores in Korea, Hong Kong, Taiwan, Singapore, Brunei, Myanmar and Japan and will probably expand in the future as it is well established and known in Asia.

Today, I will be reviewing the Hydrating Mask from their Alphabet line.

Hyaluronic Acid - H

[My Skin type: Dry/sensitive skin]

This mask contains Hyaluronic Acid (Sodium Hyaluronate) with excellent water storage capabilities, providing rich moisture to keep skin perfectly moist everyday.

Directions:
  1. Apply the toner after cleansing
  2. Remove mask from pouch and apply to face, placing mask to fit eye and lip area
  3. Remove mak after 15 to 20 minutes and lightly message the remaining solution with hands
 
Ingredients:


My thoughts: After using this for the first time, my skin instantly felt plump, it is as if my skin has sucked in some water. I like this product because it gives instant results and also after using the mask there is always a lot of serum left over in the mask packet, which means I can use the excess serum to moisturise my face. I also like the fact that there is no plastic protective layer within the mask packet because I find that very annoying especially when the serum is very runny. The smell is very pleasant and it does not smell like I have put something toxic and chemical-like on my face. I would purchase this mask again and would happily pay the price of around 50p for this which was how much it was when there was a promotion.  The material that they used for the mask feels very gentle on the skin too which is a bonus!

Pros:
  • Hydrates the skin instantly after use
  • The mask fits most facial shapes
  • Uses good material
  • Good quality
  • Nice smell
Cons:
  • Does not dry quickly